Thursday, October 17, 2013

Comments – The New Feedback


Google Docs allows you to add comments to the share document, presentation, etc. This is a useful way to share ideas or give feedback to students. Comments that you leave on students’ documents can be commented on by the students as well, and back and forth. This provides a way to have a conversation about the progress of a project/research paper or to get clarification from a student or simply to provide feedback.

To insert a comment:

·        Click in the document or select the words where you want the comment to be linked.

·        Click “insert” in the top menu bar then click “comment”

·        A comment box will appear to the right of the document where you can type in your comment.


·        This comment will not be visible to others who share the document. These comments will not appear when the document is printed.

·        Collaborators can reply to any comment by typing in the box labeled “Reply to this comment”

·        You can also click the links to “Edit” your existing comment or to “Delete it”.

·        You can also click “Resolve” to close the comment from further replies.

·        Or you can click the “comments” button in the top right corner of the document or presentation to leave general comments not tied to a specific part of the document.


Tune in tomorrow for yet another way to help save the planet.


---- IT Girl


Wednesday, October 16, 2013

Go Green with Google Drive


I am a lazy environmentalist. In fact, I am so lazy about it I can’t even get the word environmentalist out of my mouth before I have shoved another recyclable item in the trash can. Yes, I want to save trees. I love trees. I abhor landfills; they stink both literally and figuratively. I want clean drinking water and all of those other things. Unfortunately my environmental responsibility ends with me picking up litter and not throwing trash out of the window of my car. I did make adorable jack-o-lanterns out of empty glass bottles, I am sure that must count for something. And, this post is all about going green with Google.

If we are using Google Drive in a classroom setting, it makes sense not to print out every piece of writing a student does throughout the writing process. It makes a lot of environmental sense to hand in assignments electronically, especially in writing. The teacher then can comment and provide digital feedback as well. No more lugging around canvas tote bags filled with reams of paper. The final Publishing step in the writing process is the only step that dictates that printing could be a necessity.  And we all know that Publishing no longer refers to just printing out and stapling to a bulletin board or even rewriting in our very best handwriting. In fact, once this writing piece goes to my editor (yes, I learned my lesson) and I reread it one more time to make sure it is really what I want others to read, I will copy and paste it into my blog program and click the publish button. Ta-da…published but not printed.

Ok, so back to the task at hand, how to actually go green and not print everything students complete in the classroom. Remember all the previous posts about sharing? Well, that’s what this is about, too. Students creating folders in their My Drive and adding you, the teacher, to that folder. (See, it’s not magic or rocket science.) And, the steps could be reversed so that the teacher is creating the folder and adding the students. It is all a matter of preference. So without further delay, here are the instructions for using Google Drive to collect student work.

·        Students create a folder in their My Drive

·        Students name their folder. The naming conventions should be uniform from class to class and student to student. For example: Year_Period_Student Name (13-14_Period1_ITGirl)

·        Students then share their folder using the “Add people” section. (Remember that is the little folder icon with the person and the plus)

·        The student should give the teacher “can edit” rights. This allows the teacher to provide feedback, notes, suggestions, and grades.

Note to the teacher: all of the students’ shared folders will show up in your list of shared folders under “Shared with Me” in Google Drive. If you have a lot of students this can appear to be an overwhelming mess. So the best thing to do is organize the folder list. (This is a one-time thing. So think of the time investment up front as sanity savings in the long run.)

·        Click in your “My Drive” section and create a new folder for the current year (13-14)

·        Open the folder you just created. Now create new folders, one for each class period.

·        Open your “Shared with Me” section. (Remember this is where the shared student folder clutter is.)

·        If your students followed directions J and name their folders to include the class period, you can sort the folder list. (Click on the “Sort” button in the top right hand corner of the screen.)

·        Select the students for a particular class period and drag and drop the selected folders into the Period/Class folder you just created.

·        Repeat for the remaining student folders and class periods.

Now you have student folders ready to collect assignments. J

When students complete an assignment, they just add it to their folder and the document will now be available in your “My Drive”.

Now, where is my I-just-saved-the-world-super-hero-cape? I know this one act does not qualify me to call myself an environmentalist but it is a step in the right direction.

Until next time.

--- IT Girl

Tuesday, October 15, 2013

Is today Monday?


Yesterday was Columbus Day. The school district that I work in had a Professional Development Day. So technically, there was no "school" Monday. I enjoyed soaking in bed a little longer than usual --ok, longer than I should have. There were only a few small fires that needed to be put out but by 10 a.m. everything was calm. I even got to have lunch with my BFF. The blog post was an easy one, although my editor just texted me and said she knows I skipped her yesterday because she found a typo. But overall it wasn't the dreaded Monday. Monday was not satisfied to let me off the hook so she kidnapped Tuesday. That's right today has been a Monday. Computers have dropped the domain, not a tough task but it is tedious. I was supposed to teach classes about Copyright but there was a key broken off in the lock of the door to the supply room (aka my office - I will post a pic of my office soon. I think you will get a kick out of it.) So I rounded up a projector, the power cord was missing. Thank goodness the teacher called and cancelled her class - today was her first day. It is horribly humid and my hair went flat so all in all it is a MONDAY. With all of that in mind here is today's Google Form lesson. It is a two part video series although the creator says there are three videos. I could only find the two. So if you find the third - Yippeee!!!!. I think you will really enjoy it. The links follow.

http://www.youtube.com/watch?v=D3nQB3VujPI

http://www.youtube.com/watch?v=_UaofsbzZgk


--- IT Girl


Monday, October 14, 2013

Movie Time

This week in my town the forecast calls for rain. What are a few of the best activities for a rainy day? Yup, reading a good book or watching a movie. So in honor of gray skies and much needed precipitation I am providing you links to videos to guide you through creating our next topic. Google Forms.

There is SO much I want to tell you about Google Forms. I could write page and pages and pages on the use and benefits of Google Forms. You could devote your life to reading about Google Forms OR you could click on this link http://www.youtube.com/watch?v=zBDtOc4AHCQ and watch a 7 minute video that will walk you through creating an online quiz.(The best thing about using a video as a learning tool is that you can pause and rewind as often as necessary.)  I am assuming most of my readers are teachers. If you are not a teacher substitute survey for quiz. It does not matter what your occupation is or how you want to use Google Forms the process is the same.

Sunday, October 13, 2013

Sunday Funny

It's not Thursday but we are going to throw back a little. Do you even remember life before Google? Well perhaps this will take you back in time. 

Saturday, October 12, 2013

So Many Questions.

Question types


I bet you are thinking that using Google Forms means only multiple choice questions, right? Wrong. There are actually NINE questions types you can choose from. Options 1-5 seem to be the most logical choices for teacher created quizzes, but maybe y'all think more outside the box than I do.


1 - Text

  • Type in a question.
  •  The user gets a one-line text box to enter their response.
*

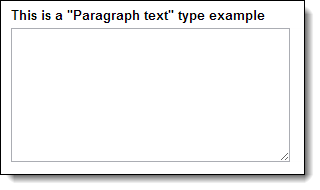
2 -Paragraph

  • Type in a question.
  • The user gets a multi-line text box for their response.
  • This type of question is best suited for open-ended or essay type responses. For my Texas ELA teachers, think 10 line short answer.
*

3 - Multiple Choice

  • Type in your question.
  • Enter in as many options as you wish for the answer choices. You can also copy and paste in your list if you have it typed up elsewhere. (Think about those quizzes you have created In Word.)
  • You can also choose to add the Other option where the user will be allowed to add and choose a write-in choice for your list.
  • When the user completes the question, they may only choose one of the choices you have provided
*

4 - Checkboxes

  • Same as Multiple Choice
  • When the user completes the question, they can choose as many of the choices as they wish from what  you have provided.
*


5 - Choose From a List

  • Same as previous two question types.
  • Note: There is not an Other option like in the Multiple Choice and Checkbox types.
  • When the user completes the question, they may only choose one of the choices you have provided from a drop-down list.
*


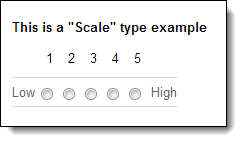
6 - Scale (While the previous question types are well suited for quizzes this particular type is best suited for surveys.)

  • Type question, type in your question
  • Enter the starting point (0 or 1) and the ending point (up to 10) for your scale
  • You can also  enter labels for the endpoints of your scale such as “Disagree the most” and “Agree the most”, or “Lowest ranking” and “Highest ranking”
  • The user will be presented with a scale of values on which to place their response
*

7 - Grid  (Again, best suited for surveys.)

  • Type in your overall question or directions that will apply to each question in the grid.
  • Choose how many columns you want in the grid (1 to 5), and you provide descriptive labels for each column
  • Enter as many rows as you wish for the grid, and enter a question or statement for each.
  • When the user completes the question, they will be presented with a grid of rows and columns and will need to click a single cell to place their response for each row.
*


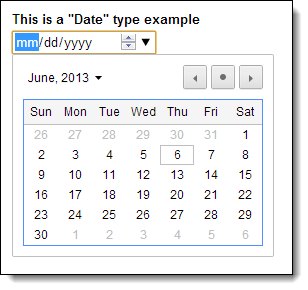
8 - Date

  • For the Date type question the user will simply choose a date from a drop down box or with up/down arrows.
  • You have the option to include the Year or not.
  • You have the option to include the Time or not.
*

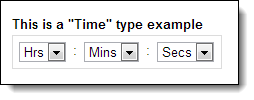
9 - Time

  • For the Time type question you can choose either the time of day format or duration format with hours, minutes, and seconds.
  • The user will then select the time or duration using drop down menus and up/down arrows.


Information provided by "Using Google Forms" by Eric Curts.
*

Forms........OH the Possibilities!

Google Forms is a free application (found in Google Drive) that allows you to:
  • Create forms, surveys and quizzes. (Yes, my teacher friends, I said quizzes.)
  • Share the form with others. (You mean I can share a quiz with my students?)
  • Allow others to complete the forms online. (Oh Yipppeeee!!! Keep talking.)
  • Collect the responses in a spreadsheet. (Oh my!! This is the most exciting news since I found out the school resource room started stocking fun colored Sharpie markers.)
  • Provide you with helpful summaries of collected data with charts and graphs. (My administrators do love charts and graphs.)
  • But what about students who "forget to put their name on the form (quiz). Don't worry. Google Forms allows you to collect respondent usernames.
--- IT Girl